
Frosted Cinnamon Oat Bliss Bars: A Deliciously Healthy Treat
In the realm of desserts, finding a recipe that strikes the perfect balance between indulgence and health can be a challenge. Enter Frosted Cinnamon Oat Bliss Bars, a delightful treat that marries the wholesome goodness of oats and yogurt with sweet cinnamon flavor. This versatile recipe not only satisfies your sweet tooth but also offers a nutritious alternative to traditional bars. Whether you’re looking for a quick snack or a satisfying dessert, these bars are sure to please.
What makes these Frosted Cinnamon Oat Bliss Bars truly exceptional is their ability to deliver on taste while being packed with nutritious ingredients. Each bite is a harmonious blend of flavors and textures, from the chewy oat base to the creamy yogurt topping. Ideal for busy mornings, post-workout snacks, or a wholesome dessert after dinner, these bars cater to a variety of dietary preferences without compromising on taste.
Understanding the Ingredients
To appreciate the Frosted Cinnamon Oat Bliss Bars fully, it’s essential to explore the components that contribute to both their health benefits and flavor profiles.
The Cookie Base
At the heart of these bliss bars lies a cookie base that is not only delicious but also nutritious. The primary ingredient, rolled oats, serves as a powerhouse of health benefits. Oats are rich in soluble fiber, which can help lower cholesterol levels and improve heart health. They also provide sustained energy, making them an excellent choice for breakfast or a mid-afternoon pick-me-up.
In addition to oats, whole wheat flour plays a crucial role in this recipe. This ingredient is a fantastic source of fiber, vitamins, and minerals compared to its refined counterparts. Whole wheat flour adds a nutty flavor to the bars while helping to keep you full longer, making it a smart addition to your baking repertoire.
Sweetness is an integral part of any dessert, and for these bars, brown sugar is the go-to option. Brown sugar not only adds a rich sweetness but also moisture, enhancing the texture of the bars. However, if you’re looking for alternatives, consider using coconut sugar or maple syrup for a lower glycemic index option.
Cinnamon is another star ingredient in this recipe. Beyond its delightful flavor and aromatic qualities, cinnamon has numerous health benefits. It is known for its anti-inflammatory properties and can help regulate blood sugar levels. This spice enhances the overall taste of the bars, providing a comforting warmth that complements the oats beautifully.
When it comes to fat, the recipe allows for flexibility between coconut oil and butter. Coconut oil has gained popularity for its unique flavor and potential health benefits, including medium-chain triglycerides that may support weight management. On the other hand, butter lends a classic richness to baked goods. Choosing between the two often comes down to personal preference and dietary restrictions.
Eggs are included in the recipe as a binding agent, adding moisture and structure. They play a vital role in achieving the right texture while also contributing protein to the bars. For those following a vegan diet, flax eggs or chia seeds can be great substitutes.
For added texture and nutrition, consider incorporating nuts into the cookie base. Chopped walnuts or almonds can provide a satisfying crunch and additional healthy fats, making the bars even more wholesome.
The Frozen Yogurt Layer
The second layer of the Frosted Cinnamon Oat Bliss Bars is a creamy, frozen yogurt topping that elevates the treat. Greek yogurt is the star here, known for its rich protein content and probiotics that promote gut health. This ingredient not only adds a smooth texture but also offers a refreshing contrast to the chewy base.
Sweeteners play a significant role in this layer as well. While honey is a natural sweetener that pairs beautifully with yogurt, maple syrup offers a distinct flavor profile that many find appealing. Both options can enhance the overall sweetness of the frozen yogurt layer without overwhelming the dish.
Flavor enhancements such as vanilla extract and a pinch of cinnamon can take the yogurt layer to the next level. These additions provide depth and complexity, ensuring that each bite is bursting with flavor. For chocolate lovers, the option to sprinkle in chocolate chips can transform the bars into a decadent treat that still maintains a healthy edge.
Optional Toppings
To make these bars even more visually appealing and delicious, consider adding optional toppings. A sprinkle of cinnamon sugar not only enhances the flavor but also adds a delightful crunch on top of the creamy yogurt layer. This finishing touch can make the bars look as good as they taste.
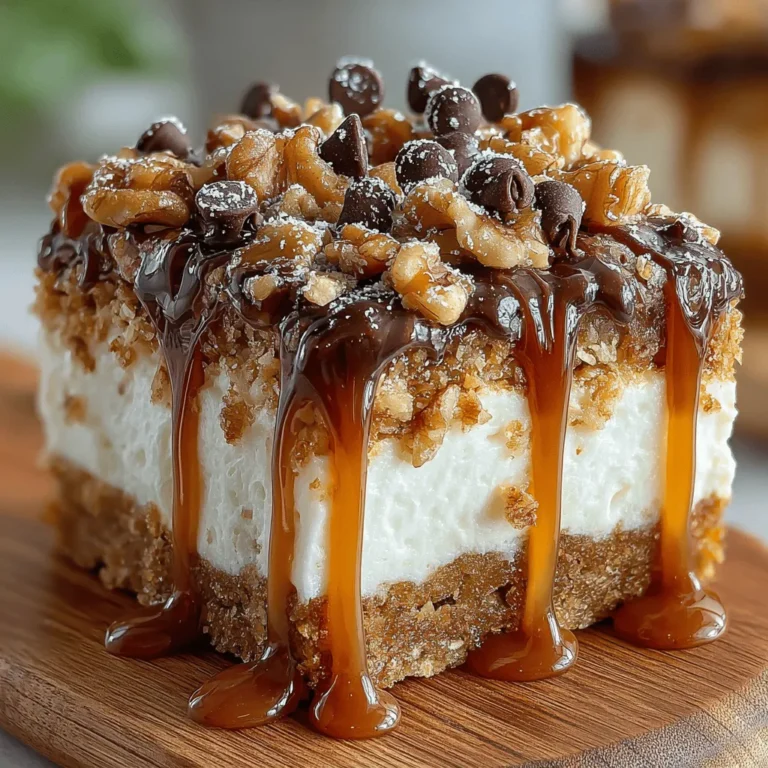
For those looking to indulge further, drizzling melted chocolate or caramel sauce over the bars creates an irresistible treat that’s perfect for special occasions or simply for satisfying a sweet craving.
Step-by-Step Instructions for Frosted Cinnamon Oat Bliss Bars
Now that we’ve explored the ingredients and their benefits, let’s dive into the step-by-step process of creating these Frosted Cinnamon Oat Bliss Bars.
1. Preheat Your Oven: Begin by preheating your oven to 350°F (175°C). This ensures that the bars bake evenly and achieve that perfect golden-brown color.
2. Prepare Your Baking Dish: Line an 8×8 inch baking dish with parchment paper, allowing some overhang for easy removal later. This will help prevent the bars from sticking and make cleanup a breeze.
3. Mix the Dry Ingredients: In a large mixing bowl, combine rolled oats, whole wheat flour, brown sugar, cinnamon, and a pinch of salt. Stir until well blended to ensure that the flavors are evenly distributed.
4. Incorporate the Wet Ingredients: In a separate bowl, whisk together melted coconut oil (or butter), eggs, and a splash of vanilla extract. Once combined, add the wet mixture to the dry ingredients. Stir until everything is well incorporated, and the mixture comes together into a thick dough.
5. Press the Dough into the Baking Dish: Transfer the dough into the prepared baking dish, pressing it down firmly and evenly to form the base. Use the back of a spatula or your hands to ensure it’s compact.
6. Bake: Place the baking dish in the preheated oven and bake for about 20-25 minutes, or until the edges are golden and the center is set. Keep an eye on it to avoid overbaking, which can lead to a dry texture.
7. Cool the Base: Once baked, remove the dish from the oven and allow the cookie base to cool completely in the pan. This step is crucial for achieving the right texture and ensuring the yogurt layer adheres well.
8. Prepare the Frozen Yogurt Layer: While the base is cooling, mix Greek yogurt, your choice of sweetener (honey or maple syrup), and any flavor enhancements in a bowl until smooth. If desired, fold in chocolate chips for that extra touch of sweetness.
As you prepare for the next steps, get ready to transform your cooled base into a delightful layered dessert that will impress family and friends alike. The journey of making Frosted Cinnamon Oat Bliss Bars is just beginning, and the result promises to be a deliciously healthy treat that everyone will adore.
{{image_2}}
Frosted Cinnamon Oat Bliss Bars are a delightful treat that combines the wholesome goodness of oats with the creamy indulgence of frozen yogurt. This recipe not only satisfies your sweet tooth but also provides nutritional benefits, making it a guilt-free dessert option. Let’s dive into the detailed steps for preparing these bars, ensuring clarity and ease for all home bakers.
Preparing the Cookie Base
Mixing Dry Ingredients
Begin by gathering your dry ingredients: rolled oats, whole wheat flour, baking powder, cinnamon, and salt. In a large mixing bowl, combine the rolled oats and whole wheat flour. The oats provide a chewy texture, while the flour helps bind everything together. Next, add the baking powder and cinnamon. The baking powder will give your cookie base a slight lift, while the cinnamon adds that warm, comforting flavor that pairs beautifully with oats.
Whisk these ingredients together thoroughly. This step is crucial as it ensures that the baking powder is evenly distributed throughout the mixture, preventing any lumps and allowing for uniform rising during baking.
Combining Wet Ingredients
In a separate bowl, combine your wet ingredients: melted coconut oil (or unsalted butter), maple syrup (or honey), vanilla extract, and a pinch of salt. Mixing the wet ingredients separately allows you to ensure that the coconut oil is not too hot when combined with other ingredients, which could cause the mixture to separate. The maple syrup adds natural sweetness while keeping the bars moist.
Once these ingredients are well combined, slowly pour the wet mixture into the dry ingredients. Stir with a spatula until just combined. Be careful not to overmix; a few lumps are perfectly fine. This will ensure that your cookie base remains tender after baking.
Spreading the Dough Evenly
Now it’s time to spread the dough into your prepared baking dish. Line an 8×8-inch (20×20 cm) baking pan with parchment paper, allowing some overhang for easy removal later. Using your spatula, transfer the dough to the center of the pan. To spread the dough evenly, start at the center and push outward toward the edges. Use your hands to press it down gently, ensuring that it covers the bottom of the pan uniformly.
This method helps create a consistent thickness across the base, which is essential for even baking. Once spread, you can use the back of a measuring cup to smooth out the surface for a neat finish.
Baking the Cookie Base
Achieving the Perfect Golden-Brown Finish
Preheat your oven to 350°F (175°C). Once preheated, place your baking dish in the oven and bake the cookie base for about 20-25 minutes. Keep an eye on it as baking times can vary based on your oven. You’re looking for a golden-brown finish, which indicates that the sugars in the maple syrup have caramelized, adding flavor and depth.
To check for doneness, use a toothpick inserted into the center; it should come out clean or with a few moist crumbs attached. If the toothpick comes out wet, give it a few more minutes in the oven.
Importance of Cooling for Texture and Assembly
Once baked, remove the dish from the oven and allow it to cool in the pan for about 10 minutes. This cooling period is crucial as it helps the cookie base firm up, making it easier to layer the yogurt on top without disturbing the cookie texture. After 10 minutes, carefully lift the cookie base out of the pan using the parchment paper overhang and place it on a wire rack to cool completely.
Creating the Frozen Yogurt Layer
Whipping Up a Smooth Yogurt Mixture
While the cookie base is cooling, it’s time to prepare the frozen yogurt layer. In a mixing bowl, combine your choice of yogurt (Greek yogurt works wonderfully for a thicker texture) with a sweetener of your choice, such as honey or agave syrup, and a splash of vanilla extract. Use a hand mixer or whisk to combine these ingredients until smooth and creamy.
If you’d like to add a bit of decadence, consider folding in mini chocolate chips or crushed nuts at this stage. This not only enhances flavor but also adds a delightful crunch to the final product.
Options for Customization
The beauty of this recipe lies in its versatility. You can customize the yogurt layer by experimenting with different flavors and add-ins. For example, try using flavored yogurt, such as strawberry or blueberry, for a fruity twist. You could also swirl in some fruit puree or even a spoonful of nut butter to create a unique flavor profile.
Assembling the Bars
Techniques for Even Layering
Once the cookie base has cooled completely, it’s time to assemble your bars. Carefully spread the yogurt mixture over the top of the cookie base using a spatula. Start from the center and work your way to the edges, ensuring an even layer. This will help create a beautiful cross-section when you cut into the bars.
For a more decorative touch, you can use a piping bag to layer the yogurt if you want to get fancy. This technique allows for more control, especially if you’re creating a pattern or design.
Creative Ideas for Topping the Yogurt Layer
Before freezing, consider adding a topping to enhance both the flavor and presentation of your bars. A sprinkle of cinnamon, a handful of granola, or a drizzle of melted dark chocolate can elevate these bars to an entirely new level. Fresh fruit slices, such as strawberries or bananas, also add a burst of color and freshness.
Freezing for Perfection
Importance of Freezing Time
Once assembled, place the bars in the freezer for at least 4 hours, or until the yogurt layer is firm. This freezing time is essential for achieving the ideal texture; it allows the yogurt to set properly and makes slicing easier. If you’re planning to serve them for a gathering, it’s best to prepare them a day in advance to ensure they are perfectly frozen and ready to be enjoyed.
Serving Suggestions
Tips for Slicing and Serving
When ready to serve, remove the bars from the freezer and let them sit at room temperature for about 5-10 minutes. This short thawing period makes slicing much easier and prevents the yogurt layer from cracking. Using a sharp knife, cut the bars into squares or rectangles, depending on your preference.
To create an inviting presentation, consider serving the bars on a colorful platter. You can garnish with fresh fruit, a sprinkle of oats, or a drizzle of yogurt. For added fun, serve with a side of extra yogurt or a scoop of your favorite ice cream.
Ideas for Presentation and Garnishing
For a visually appealing display, arrange the bars alongside fresh berries or a small bowl of yogurt for dipping. You can also top the bars with additional chocolate chips, nuts, or a light dusting of powdered sugar for an elegant touch. These small details enhance the overall aesthetics and make your dessert look professionally crafted.
Nutritional Information
Frosted Cinnamon Oat Bliss Bars are not only delicious but also packed with health benefits. Each bar is a good source of fiber, thanks to the oats, which aids in digestion and helps keep you feeling full longer. The use of yogurt provides protein and probiotics, promoting gut health. Additionally, the natural sweeteners contribute vitamins and minerals without the refined sugars found in many desserts.
Each serving can be tailored to fit dietary preferences, whether you’re looking for a vegan option or need to avoid gluten. By modifying the recipe according to your needs, you can enjoy these bars guilt-free while indulging in their delightful flavors.
Conclusion
Frosted Cinnamon Oat Bliss Bars are truly a wholesome dessert option that can be enjoyed without guilt. With simple ingredients and an easy preparation process, these bars deliver a satisfying sweetness while retaining a nutritious edge. Ideal for any occasion, they can be customized to suit personal tastes and dietary preferences. Embrace the joy of homemade desserts with this recipe and indulge in a delightful blend of flavors and textures that everyone will love. Whether served at a party or enjoyed as an afternoon snack, these bliss bars are sure to impress and satisfy.
